Showing posts with label AmberInk. Show all posts

Monday, December 5, 2011

Amber Ink Holiday Blog Hop...

Welcome to our second annual Amber Ink Holiday blog hop. This year our alumni are tapping in to their inner elves for some fun and
frolic.


We've made our list but you'll probably want to check it twice.
Or check it thrice. We just don't know who'll be naughty or nice.

There are 23 commenting spots to be precise
And 23 prizes to help entice.

So see those badges down below?
Roll the dice. Let elf magic flow…

Hop on Monday
Hop on Tuesday
Prizes on Wednesday

One Grand Prize winner will receive an Elf of the Shelf gift set, so be sure to
visit every single elfin spot. The final list will be sent to Santa, so
remember… the only person you are really competing with is your elf.

That silly elf just can't seem to keep himself out of trouble some days. Lookie who we found on our tree...


I resized the digi images down to about 2.5 x 2.5 inches (depends on the size of your glass balls) and create a mirror image. Print out both the original and the mirror image. 

Color both elves.

Cut out both elves (carefully! Those tiny arms and legs aren't the easiest to cut out.) When you're finished cutting them out glue them back to back with a piece of fishing line in the middle.  Run markers around the edges of the elf to clean up the edges. 


Now its time to slip that naughty boy into his hiding spot. Carefully fold the arms and legs in and slip him into the glass ball. Hand onto the fishing line so you can position him when he's in. If his arms and legs are still folded in a bit, slip a paintbrush or something tiny in and carefully push the paper down. DON'T stick your finger in the glass ball and attempt to do this. Lets just say I learned that the hard way last year. 


And because elves are magical creatures he needs a bit of sparkle. Add a bit of Stampendous Shaved Ice or Glitter. 

Add the ornament top back on. Add a bow and hand on the tree!

I had so much fun playing with this cute elf I had to make a card to go along with the ornament. I colored him in with Copics and added lots of Shaved Ice for sparkle.

To create the snowflakes I used the Kreaxions Punch #312. I added glue to both sides of the snowflakes and dipped them into the glitter. Lots of sparkle!


I have one more project to share with you. I was in an ornament making mood, so I dug out my Amber Ink Fish Wishes Clear Set (aka Willem's Fishes) and set to work. I stamped the fishing pole image on Stampendous Acetate in Archival Ink. When it was dry I flipped it over and colored it with Copics. Using a Kreaxions Circle cutter, I cut the image out. Roll the image to fit it in the glass ball. For the sand, I colored in glass hole less beads with Copic refills and poured them into the ball. Add a bit of ribbon and you're done! This ornament will be going to my little fishing addict this year.


PRIZE: Want to win Amber Ink Snow Angel of your own? Be sure to leave a comment. I'll be drawing a winner Wednesday! Ready to hop? Follow the torches in Mr Linky...

Wednesday, July 20, 2011

PARTY time at AmberINK...

Its time for a PAR-TAY!!! Amber INK is turning ONE and we're going to celebrate in style! Today's festivities....a BLOG HOP! 


Here's the official word on this birthday bash of epic proportions:

Twelve short months ago
we made our big debut,
So now we'd like to commemorate
our 1st birthday with you!
This flash mob of torchbearers
always light our way.
Won't you please jog along
on our special day?
Leave your comments here and there
over the next 48
On Friday we'll announce the loot
Don't wait...let's CELEBRATE!

My card today uses the martini glass from the set, The Hostess With the Mostess.  I paired it with a punched border (Kreaxions #304) to add a bit of elegance to the whimsy. 


Are you ready to hop on the train and join the party? Well lets get hopping! If you just happened upon my blog without starting at the beginning be sure to head on over to the AmberINK. You should have arrived here from Taylor's Blog.  Next on your stop is Sunghee!  Enjoy your ride on the party train!!!


Monday, July 18, 2011

Grab your Party Hat and celebrate with AmberINK...


Its birthday time at AmberINK!!! AmberINK is turning ONE and we're ready to party! Be sure to check out AmberINK Festivities page to see all whats going on all week! 

Today's challenge...Party Hats! Whats a party without a party hat, right? Amber has even supplied the party hats (or lampshades if you prefer, lol) on the AmberINK BLOG. You have until tomorrow morning (Tuesday) to post your decorated hat to be in the running for a $24 gift certificate to the AmberINK store.


I used the owl in Book Plates to create this party card. I placed the hat on him in photoshop, colored him and printed him out. I also created a "happy birthday" banner in photoshop, printed it out, cut under his talons and slipped the banner under his talons. 

You might notice that the original owl has a book in his feet and a sentiment in a circle around him. I erased it out with the paintbrush tool in photoshop. 


So go pick up a party hat and start decorating! And be sure to stop by and wish AmberINK a happy birthday!!!

Monday, March 28, 2011

Best Fishes....

Hi everyone! Today I'm sharing a fish card I created for my son using punches. You can find the tutorial for it over at the Just Imagine Kreaxions blog.  I used punch #304 to create the scales. The Circle Cutter for the bubbles & eye. And the sentiment is one of my favorite sets (wink) from AmberINK, Best Fishes. 


Here is a closeup of the scales. Super simple technique and I can't wait to try covering a cardfront with something like this!


And here is a closeup of the bubbles and his eye....


Thanks for stopping by! Have a great Monday!

Monday, February 14, 2011

Virtual Valentine's Day Hop

Happy Valentine's Day! To celebrate Valentine's Day Taylor has organized a Virtual Valentine's Day Blog Hop with lots of inspiration, eye candy and prizes along the way. So get comfy and get ready to hop...hop...HOP! 

Be sure to visit Taylor's blog The Quiet Moments for all the rules and details! You have until Thursday 6:00PM to leave comments on the participants blogs to be eligible for prizes from StampInsanity,  Meljens designs,  Pixie Dust Studio, Lizzie Anne Designs,  Christian Paper Crafts ,  Paper Pretties,  Karber Digital Images,  Di's Digi Downloads,  The Scrappychick Boutique,  Stampendous,  Pink Cat Studio,  Amber Ink,  Simply Betty Stamps, Mark's Finest Papers,  Dreamweaver's Stencils,  Chi Chi Memories,  Little Potato House, Kenny K digis,  Kraftin' Kimmie Stamps


I'm sharing a card that I made for my hubby for Valentines Day using Amber INK digital stamps...


I used AmberINK's Love Bunny- Baby Cakes image for the card. This digital image comes with the option of using both rabbits with the cake or just one rabbit. I used the single rabbit image and duplicated it. I placed the images so their bunny noses were touching. I decided I didn't really feel like coloring with Copics so I went through my old stash of freebie digital papers and found these gorgeous papers by Nicole Young Designs. I scaled it down and placed it behind my bunnies on my photoshop page. Next I colored the rabbits in with a light blue color in PSE. I used the brush tool and reduced the opacity to about 35%. I added my sentiment in PSE. All that was left to do was print it out and add a bow. Easy peasy card for the hubby! 


and here is the list of Blogs on the Blog HOP
Taylor Usry - http://taylorusry.blogspot.com/
Libby Hickson - http://stampinlibby.blogspot.com/
Cindy Coutts - http://cindycoutts.com/
Cyndi Bundy - http://scrappychickcyndi.blogspot.com/
Amber Hillman - http://ambersantics.blogspot.com/
Angelique Nederpel - http://scrapping-angel.blogspot.com/
Tanya Johnson - http://little-scrapper.blogspot.com/
Suzi McKenzie - http://mrsweyremaster.blogspot.com/
Cathy Wallington - http://ellieskeeperscreations.blogspot.com/
Pam Hornschu - http://1pamperedstamper.blogspot.com/
Wendy Price - http://paperinkandsmiles.blogspot.com/
Patricia Hays - http://thinkingofinking.blogs.splitcoaststampers.com/
Maria Levine - http://riacreations.blogspot.com/
Sandie Dunne - http://sandieshores.blogspot.com/
Juanita Gillen - http://stampintwilghtmom.blogspot.com/
Janelle Stollfus - http://rainpuddlesdesign.blogspot.com/
Mary Collins - http://www.softangelkisses.blogspot.com/
Berenice Rendon - http://karbersweetescape.blogspot.com/
Cheryl Gorka - http://shestamps.blogspot.com/
Jessica Fitzgerald - http://jkfitzgerald.blogspot.com/
Dee Morris - http://sprytebyrd.blogspot.com/
Darsie Bruno - http://www.craftingwithdarsie.blogspot.com/
Sandy Allnock - http://acolourfulworld.blogspot.com/
Margie Cortina - http://ohbumbleismemargie.blogspot.com/
Kathy Fronczak - http://pixieduststudio.blogspot.com/
Cat Darling - http://catscraftycorner.blogspot.com/
Joyce Martens (Jolara) - http://jolaras.blogspot.com/
Erin Leveille -http://stamptillucramp.blogspot.com/
Gudrun Loennecken- http://papirbloggen.blogspot.com/
Mackenzie Bruckler - http://midnightscramper.blogspot.com/
Melissa (Pink Cat) - http://pinkcatstudio.blogspot.com/
Patty Tanuz - http://cardsbypattytanuz.blogspot.com/
Emily Leiphart - http://www.leiphartonart.blogspot.com/
Jane Matsumoto - http://whoopsiedaisy-jane.blogspot.com/
Kimme Leach - http://kimme-thelifeofaprincess.blogspot.com/
Kerry Kung - http://kerryischilling.blogspot.com/
Heather Lee-Reppen - http://inkonmyear.blogspot.com/
Rachel Sztonyk - http://gingerbreadgallery.blogspot.com/
Jennifer Dove - http://just4funcrafts.blogspot.com/
Lysa Q- http://lysaq.blogspot.com/
Erica Johnson-Wanzer - http://www.inkedupandreadytoplay.com/
Tina Kiehn - http://kiehn10.blogspot.com/
Sugar Whiting - http://sugscardsnmore.blogspot.com/
Karin Martin - http://karin-withaniforpaper.blogspot.com/
Sunghee Chon - http://www.creativityinprogress.com/blog/
Tanis Palmer - http://tannyps-rubbish.blogspot.com/
Lindsey Martin-Penny - http://www.bashfulblogging.blogspot.com/
Kristi Parker Van Doren - http://kristiscreativecafe.blogspot.com/
Julie Elak - http://www.lastminutecrafter.blogspot.com/
Alison Heikkila - http://alisonsrandomthoughts.blogspot.com/
Audrey E - http://hippieaud.blogspot.com/
Laura Drahozal - http://www.rememberinglifesmoments.blogspot.com/
Louise Healy - http://www.artfullyarticulate.blogspot.com/
Wendy Jordan - http://www.papertherapy-wendy.blogspot.com/
Lynell Harlow - http://www.dreamweaverstencils.blogspot.com/
Terrece Siddoway - http://www.made4ubyt.blogspot.com/
Liz Martin - http://www.blackcatsstudios.blogspot.com/
Kim Reid - http://kraftinkimmiestamps.blogspot.com/
Beth Ranney-Thomas - http://inkyfingersrule.blogspot.com/ 

Almost forgot to snap a photo of these before DS went off to school with them. At about 2 o'clock yesterday we remembered we hadn't started his valentines yet....oops! So we sent the hubs off to the dollar store for lollipops and got to work on photoshop. I had shown DS a blog with a similiar project on it last week, so he was all about recreating them. We took a photo of him against a white drop cloth with his hand extended. Next we cropped out the background in PSE. Dragged some digital paper behind him and add a sentiment. He signed his name right on the photo in PSE using the Wacom tablet. After printing them out, I cut slits at the top/bottom of his hand. He threaded the lollipop stick through and secured them with tape. He's already told me that next year he wants to make those strawberry candy boxes...ughhhh! My oldest DS and I made those a few years back and they took FOREVER! Guess we better start earlier next year. ;)


Friday, January 21, 2011

its PARTY time!

That's right! Its time to party because today is Amber's 29th birthday! Woo hoo! Hope you're having a fabulous birthday chickie! I baked up this special cake just for you! (pink icing of course!)

 
Join us for Aloha Friday over at the AmberINK blog this weekend to celebrate in style! If you haven't played along in Aloha Friday...why not?! Its a linkie party with a different theme each week. Lots of FUN! This week's theme...birthdays! 

And be sure to hop on over to the store and check out the new releases! Check out Karin-with-an-i's winning stamp set....Mod Kitch Kitsch!

supplies: AmberINK LoveBunny-Baby Cakes & Hope, Popcorn, Wine (background was created with a stamp from that set. Can you guess which one? )

Friday, December 10, 2010

Photo Ornaments with Holidays Handmade

If you're visiting from Julie's blog...WELCOME! Yay! So excited to be able to share today's post with you!  Today I'm going to share a photo ornament tutorial that I did for Julie's Holidays Handmade. You don't need much for this ornament...some stamps, a clear box and some holiday spirit! 


 You can use any smaller image stamp/digital sets, but I used Willem's fish over at AmberINK. Ok, they're not really called Willem's fish, but for those of you that are new to my blog I'll give you a bit of back history. My youngest, Willem is obsessed with fishing. Obsessed! When he learned that the prize for AmberINK's INKredible 21 day challenge * was a customized stamp set designed by Amber he was all over me to enter. why? He wanted fish stamps! LOL! Fast forward a bit and here is the set... Fish Wishes, but it will always be Willem's Fishies to me. LOL!

* by the way there is still some time left to enter this months challenge...Wrap it Your Way! Go enter!!!  Also be sure to stop by AmberINKS blog and play along in Aloha Friday! Every Friday there is fun Aloha Friday post. And some weeks there may even be a prize up for grabs*


I had to laugh at teacher conferences when all his pictures and essays had fish in them. Yep, thats my boy! So I created this photo ornament for his teacher with what else, but FISH! 


I found that The Container Store Amac boxes are awesome for this project. They come in a variety of sizes and colors, but I used the 2 inch square clear boxes. If you are unable to find the boxes, you could use any clear box. I've made a similiar project with a dollar store button box. Or even those clear boxes that the ipods come in would work wonderfully!


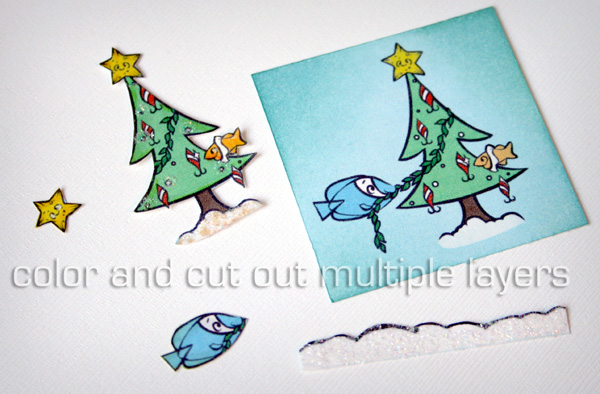
Next you'll need some photos and stamped images. I printed off a few of the digital image so that I could cut parts of the image out and layer them. You might notice that they're already colored. Yep, the wonders of photoshop! I used the paint bucket tool to add color to the parts of the image. I went in afterward and added colored pencils, ink and stickles to jazz them up. Adding the main color in photoshop really saved on my time and copic ink though. ;)


Here they are all jazzed up and cut out....


The next step is to adhere all the layers with foam adhesive. Don't worry about the foam adhesive showing from the side view. We're going to hide that with ribbon. All the extra layers and cutting might seem like alot of work, but it really goes fast and it adds so much depth to the ornament. 


On the back of your scene adhere a photo. Place them inside the box. Insert a loop of fishing line into the box between the photo/scene. Close the box up, wrap the ribbon around the sides of the box and into a pretty bow. Sit back and enjoy your handmade ornament! You can customize it even more by adding the year onto the box with rubons.


A big thank you to Julie for letting me share my tutorial on her blog!!!! I have to say I have been so excited for this day! Have a great Friday everyone!!!

Thursday, December 9, 2010

Holidays Handmade...

Have you been following all the amazing tutorials this week over at Julie Fei-Fan Balzer's blog for Holidays Handmade? I have so many projects from there that I want to make....now just to find more hours in the day to do them all, LOL!  I am SO excited to be sharing a tutorial over on her blog tomorrow!!! 


Can't exactly blog without sharing a card now, can I? Today's card is an older one that I did using AmberINKs Tis the Season To Be Pretty.  What's that? Where are the holiday stamps in the card? I turned the mistletoe, added a few flowers to it and created a bouquet from it. I colored it with my copics. The rub-ons are from October Afternoon (not sure they still make them)


Be sure to stop back tomorrow for my Handmade Holidays Tutorial and a Lizzie Anne Design Team Challenge! 

Tuesday, December 7, 2010

AmberINK Holiday Blog Hop

Welcome to the 1st annual AmberINK holiday blog hop! 


We were given the challenge course dinner for two. Using 7 techniques or products and 2 main colors along with a neutral. I stretched the rules a bit with 2 colors (red & green) and alot of neutrals. LOL! My 7 courses are cardstock, digital images (Tis the Season to be Pretty), stickles, copics, tulle, ipapers, and punchs.


Are you ready to start hopping? Here is the master list in case you get lost along the way. Be sure to leave some love to my fellow torchbearers. Who knows there might just be a prize or two hidden along the way. ;)

Next on your hop is Emily! Wait to you see the cute santa baby card she made! Love it!!!

 Our Ambassador of Awesomeness:
Shannan Teubner @ http://withfeathersandsequins.blogspot.com/
 
Purple Team:
Karin Martin @ http://karin-withaniforpaper.blogspot.com/
Melissa Czapor @ http://melissaccreates.blogspot.com/
Stacie Gorse @ http://hestiashelper.blogspot.com/ 

 Brown Team:
 Jackie Randolph @ http://papermoments.blogspot.com/
Julie Elak @ http://lastminutecrafter.blogspot.com/

 Pink Team:
Julia Dunnit @ http://stamping-ground.blogspot.com/

Blue Team:
Kerri Michaud @ http://cardsbykerri.blogspot.com/

Orange Team (ROCKS):
Taylor Usry @ http://taylorusry.blogspot.com
Wendy Price @ http://paperinkandsmiles.blogspot.com
Emily Leiphart @ http://www.leiphartonart.blogspot.com/
Angela Hathikhanavala @ http://papercupboard.blogspot.com/
Sunghee Chon @ http://amberinklings.blogspot.com/


Be sure to stop by the AmberINK blog for all the deets! 

Since I couldn't follow the directions too well as far as colors for the challenge, I thought I'd share an extra card that I hadn't posted yet. See this one follows the colors! ;) 


Wednesday, November 24, 2010

Celebrating with AmberINK

I'm back with more peeks at the latest AmberINK stamp set, Best Fishes. I've had so much fun playing with this set!!!

This time I'm going to share some samples I made with celebration themes. Remember how I told you that the digital set comes with extra images for you. Well the plain strips of bubbles in this card is one of those extra sets. I simply added them next to the "celebration bubble" image and its the perfect card front size. To save myself alot of coloring time, I added an aqua background in photoshop. 


For this next card, I paired the "best fishes" sentiment and the fishie with the Goldfish Blue iPaper. Again, I was feeling a bit lazy on coloring so I added color to my sentiment right in photoshop and printed it out. By using the dropper tool in photoshop you can pick up the exact shade of the digital papers to use in your image if you want... kinda cool!  The fish comes with a plain birthday hat that I've been having fun adding strips and polka dots to. 

Well I'm off to go watch Hells Kitchen and catch some zzzz's. I have to get up early to beat the crowds at the grocery store tomorrow morning....FUN! 

Tuesday, November 23, 2010

more sneak peeks from Best Fishes...

I'm back with more samples with the newest AmberINK release... Best Fishes! At first glance it might appear to be a Holiday set with the Santa hat and Christmas tree, but today I'm going to share two projects that will have you utilizing this set all through the year. 

First up is Valentines Day! It won't be long before the Christmas decorations are on clearance and Valentines decorations are hitting the shelves. Is it just me or does it seem that the stores get earlier and earlier with each holiday release. Anyway, back to Valentines. The kissing fish in the set could be used under the mistletoe/fishing rod but in this case I decided to use them alone and make them into a card for a loved one. I used them as they were but if you're using the digital stamps you could flip one of the fish and have 2 of the same fish kissing. Or maybe even have one bigger than the other so it could be a parent kissing their child goodbye. Or you could just create a school of fish with them and not even have them doing kissy faces at each other. 

If you purchase the digital set you'll get 5 extra images that aren't in the clear stamp set. The following bookmarks use one of those images. In addition to the Celebrate bubbles image the digi set also comes with a  blank tall set of bubbles. You can use them to create a fun background (hint for tomorrows card) or you can add your own letters in photoshop. Willem is really starting to get into reading now and I wanted to do a project with him to encourage his reading. I added the letters READING and printed them out at approximately 7 inches long. 


I have had so much fun playing with this set and the smile on Willem's face when he saw his fishies was priceless! Want a chance to help collaborate on your own set of stamps? What are you waiting for! The new AmberINK Challenge is up!!! This months theme is Wrap it Up with Amber INK! 

Monday, November 22, 2010

its time! its time!!!

I am so stinkin EXCITED!!! Do you remember a few weeks back when I shared a layout I did for the AmberINK challenge (and begged for votes...wink)? Well it won and the grand prize is a stamp set customized by Amber. :)   I had a little birdie in my ear whispering that he wanted fish stamps. I know...big surprise, huh? LOL!  I have to admit I felt a bit guilty asking Amber for fish stamps in the middle of winter. Its not exactly fishing season. Well my jaw dropped when she sent me sketches to review....she is BRILLIANT! Check out the new set  FISH WISHES!  This set is too stinkin cute! It can be used for the holidays and also through out the year. 

One of the cool things about digital stamps is you can resize them, flip them, layer them and even color them right on the computer. For this first card, I colored the sentiment in a blue shade. In order to do that I had to click on each letter with the paint bucket symbol. Next I copied my blue sentiment and added it 5 times to my page. Since I was working with TIFF files I was able to layer the swordfish on top of the sentiments and have them masked behind him.  


This next card just may be my Christmas card design this year! LOVE how those cutie patootie fish are decorating the tree. And did you see what they're decorating the tree with? ;) You know my little fishing addict now wants to decorate the tree with fish decor this year. I axed the idea of hanging all this lures on the tree but I promised him that we'd look for a big bag of (new, clean) bobbers to add as ornaments. 


Be sure to stop by tomorrow! I have more cards to share and my little fishing addict even has a project to share with you that he created with the stamps! Stop by the AmberINK blog to see what the Torchbearers have whipped up with Best Fishes! 

Tuesday, October 19, 2010

Trick or Treat...

Not too long ago AmberINK offered this darling pumpkin on their blog as a freebie and I snagged him up.I usually don't mix my stamps but I had this "trick or treat" sentiment from Lizzie Anne sitting already stamped and punched on my desk and thought it worked well with the sketch. I loved Jen Del Muro's sketch this weekend and had to give it a try! I colored the pumpkin in with copics. To create the dots around the circle, I added dots of dk grey with a copic, dotted the center with a white gel pen and then added Glossy Accents. I coated the sentiment with Glossy Accents and added a sprinkle of glitter to the top while it was still wet. 


Its time to welcome new Torchbearers to AmberINK!!! Woo hoo! Go Team ORANGE! :)

I'm entering this is the following challenges:
iheart2stamp- sketch
fancy and fussy- halloween
2 sisters- halloween
card of the week- halloween
crazy challenge- halloween

Sunday, October 10, 2010

Trick or Treaty with AmberINKy

How sad is it that I've had a month to work on the challenge and its not until the final hours that I'm getting my entry in. I'll totally shame myself with this confession but this was the first time I did anything crafty all week. After such a busy August and Sept, I think I was feeling a bit burnt out but I'm back! 


I always saw imagined myself as a mom handsewing all my kids costumes. You know those cute fuzzy animals costumes for the babies...always wanted to make one of those. And then I had kids and reality set in...there aren't enough hours in the day and I stink at sewing. LOL! I posted pictures of this costume back when I made it, but I thought this AmberINK image would be perfect for creating a layout with. I printed it out on white cardstock and also a text pattern paper. After paper piecing the image I added some shadows onto the wraps with a grey copic. 


I cut the title using Street Signs on the Cricut, inked them a bit and wrapped them with tattered fabric strips (Maisy Mo). 


I'm entering this in the following challenges:
AmberINK Trick or Treat Challenge
Bee Crafty- Halloween
The Secret Crafter- distressing
Stamp, Scrap & Doodle- Halloween
Some Odd Girl- Fabric

Friday, September 17, 2010

passing the torch

(sniff sniff) It is time! And as sad as I am that the month is over so quickly I am SO excited for you to meet my torchbearer....SUNGHEE. If you have not been to Sunghee's blog at Creativity in Progress you have to check it out! You better give yourself some time because you are going to find yourself going back to check out all her amazing archived posts. I am in AWE each time I see her latest projects. She is able to create these hybrid 3D projects that just blow my mind. 

So join me in welcoming Sunghee with a little hello....


I had so much fun creating this card. I used the Oh What a Doll! Day at the Beach and Just a Little wave Hello sets. Her dress is stamped and cut from the Dolphin Pink Paisley iPaper. The lunchbox is from the Om Nom Nom digital set. I "erased" out the middle of the lunchbox and layered the AmberINK badge behind it to create the lid. And of course I colored it orange in honor of the orange AmberINK torchbearer badge. Go orange! LOL! 


And now it is time to switch out my badge and join the alumni of AmberINK. I joking told Amber and Pam that I wanted to hang onto that torch and keep running. "neener neener, you can't have it back" LOL! It has been such an incredible journey and I feel so thankful for the opportunity to get to meet these wonderful ladies. As I told them, its not goodbye. I will be here rooting them on and playing in the challenges! and Taylor, thank you so much for passing that torch to me!!! I am so honored that I had the chance to follow in your footsteps in carrying the torch!


Sunday, September 12, 2010

Voting time at AmberINK 21 Day Challenge

I'm not ready to start the week again tomorrow. Just one more day to the weekend would be really really nice. ;) Tonight I'm sharing a few more cards that I did for AmberINK. Before I get to the cards, be sure to head over to the INKredible 21 Day Challenge and vote for your top 3 choices. The vote is open through tomorrow. 

This first card uses AmberINK's clear stamp set Can I Keep Him and Om Nom Nom. Wondering where I used the Om Nom Nom digi's on this card? See that cool background...its from the set. The cool think about digi is that you can create really cool patterns with the images. 


Here is a close-up of the cutie patootie...


This next card was a FUN one to create! Using photoshop, I created a blue thought bubble and added text with in the bubble. The fish are from the Baby Mermaids Friendship set. 


(yawn) I'm off to bed to catch some zzzzz's before I have to get up and start the Monday morning school rush all over again. Good night all!

Monday, September 6, 2010

Whoo loves you?

Happy Labor Day! I've been off spending the last few days of summer with the DH and kiddos. As sad as I am to see summer end, I think I'm ready for everyone to get back on a schedule. 

Today's card uses one of the new AmberINK digital Book Plates- Owls. I have a soft spot in my heart for owls. I just think they're so cute! Back in college I did my internship at a avian rehabilitation center. One of my favorite residents was this adorable, blind saw whet owl. Such a cutie!  I used a bit of artistic liberty when coloring this cute guy in. I colored him with Copics and then went in with my Koh-i-noor pencils and added some more shading in. The originally digital image has a tree limb filled with 3 owls. I cut the other owls off and trimmed the tree a bit shorter to fit on my card. I cut his wing away from the book and popped it up on pop dots. The "take note" is an older October Afternoon rubon that I added to the book. 


Just a reminder that the AmberINK 21 day challenge deadline is coming up. Be sure to get your entry in for a chance to win an uber-awesome prize! The deadline is midnight Sept 10, 2010.


I am entering this in the following challenges:


Monday, August 30, 2010

Congrats to you....

Happy Monday! not really, but I'm trying to convince myself of it. It just seems to be one of those days when I want to crawl back in bed and pull the covers over my head. I head out to Walmart to find they don't even have a single stinkin composition notebook. In fact they don't have much of anything on my back to school list. I call to get the boys appointments for haircuts only to find the stylist called out. sigh. I sit down and spill my coffee...twice! I reach for the pepper only to knock the bottle of garlic into my sons milk. sigh. Its just seems like its going to be one of those day. It is a Monday, after all!

My card for today is another one that I made using the AmberINK the Kiddos; Turned My Head, The New Girl, and The Gossip. i printed them out at about 1 inch and punched them with a 1 inch punch.  The line paper is from the digital stamp Ingredients. I just simply trimmed off the words. The rub-ons are from Creative Imaginations. I was trying to follow the line in the sketch at Get Sketchy so I used the dot rub-ons, but I'm not certain I'm liking it on the design. 


I'm entering this in the following challenges:

Sunday, August 29, 2010

Good Luck...

Its a two post day today, but I wanted to share with you Aloha Friday at Amber Ink.  This week's topic is "Eat, Pray, Love". Pick one or all three and share what inspired you this week and post it by Monday. And even if you don't share you should pop on over and see what the girls have been inspired by this week. Definitely a few yummy recipes that I want to try now!!!  My inspiration this week came from a website I just discovered... MOD Cloth. Hard to pick just one thing I LOVE, but here it is... Peanut Butter Cake pan. I'll take one of everything in the store...thank you! 

I'm sharing with you another card made with the Om Nom Nom set at Amber Ink.  Because they're digital images you can layer them and size them to create scenes with them. I was able to add in my sons name in photoshop with the wacom pen. I added the fish from Friendship Baby Mermaids to the lunchbox. The polka dot paper is the Sunny Yellow Swiss Dots iPaper. 


Duh, see this is what happens when I try to write a blog post with a 7 year old talking in my ear at the same time. I forget half of it. LOL! Editted to add: I'm entering this card in the following challenges: